
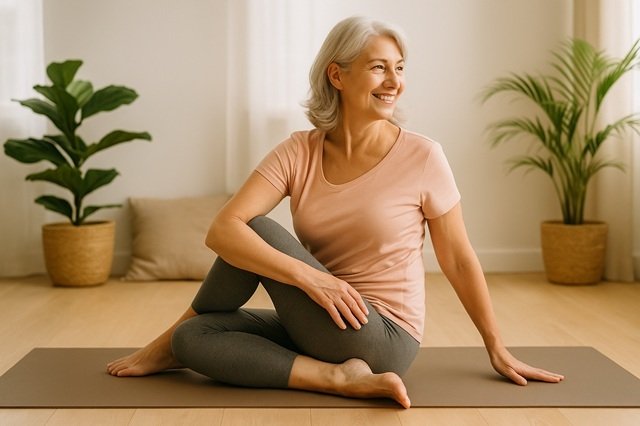
🧘 Introduction: Why Yoga Is the Secret Weapon for Joint Pain Relief
If joint pain has made everyday tasks uncomfortable — walking, standing, bending, or even sleeping — you’re not alone.
Millions of people over 40 deal with chronic stiffness, aches, and inflammation in the knees, hips, back, shoulders, and wrists.
What many don’t realize is that gentle yoga can ease joint pain and offer immediate relief — without painkillers, complicated workouts, or expensive treatments.
Table of Contents
✅ Here’s why it works:
- Improves joint flexibility without strain
- Boosts synovial fluid to lubricate joints
- Reduces inflammation and stiffness
- Enhances circulation to painful areas
- Strengthens supportive muscles around the joints
- Lowers stress, which contributes to body-wide tension and pain
And best of all? You don’t have to be flexible. You don’t need fancy gear.
Just 10–20 minutes a day of movement can lead to less pain and more freedom.
Let’s explore 9 beginner-friendly yoga poses that help ease joint pain — instantly and naturally.
🔹 Pose 1: Child’s Pose (Balasana)
Target Areas: Hips, knees, lower back
Why it helps: Gently stretches the spine and hips, improves mobility, and reduces lower back tension.
How to do it:
- Kneel on your mat, big toes touching, knees wide.
- Sit back on your heels and fold forward, arms extended or by your sides.
- Rest your forehead on the mat and breathe deeply for 1–2 minutes.

🔹 Pose 2: Cat-Cow (Marjaryasana-Bitilasana)
Target Areas: Spine, neck, wrists
Why it helps: Increases spine flexibility, reduces neck and back stiffness, and promotes spinal fluid movement.
How to do it:
- Start on hands and knees in tabletop position.
- Inhale: arch your back, lift your chest and tailbone (Cow).
- Exhale: round your spine, tuck chin (Cat).
- Flow gently between both for 1–2 minutes.
🔹 Pose 3: Supported Bridge Pose
Target Areas: Lower back, hips, knees
Why it helps: Opens hips, strengthens glutes and hamstrings, and decompresses the lower spine.
How to do it:
- Lie on your back, knees bent, feet flat, hip-width apart.
- Lift your hips slightly and place a yoga block or cushion under your lower back for support.
- Rest and breathe deeply for 1 minute.
🔹 Pose 4: Reclined Twist
Target Areas: Spine, lower back, hips
Why it helps: Relieves pressure on the spine and stretches the muscles around the back and hips — perfect after a long day sitting.
How to do it:
- Lie on your back, bring knees to chest.
- Drop them gently to one side, arms in a T-position.
- Hold for 30–60 seconds, then switch sides.
🔹 Pose 5: Seated Forward Bend (Modified)
Target Areas: Hamstrings, lower back, knees
Why it helps: Increases flexibility in the back of the legs and spine. Great for tight hamstrings that pull on the knees and hips.
How to do it:
- Sit with legs extended.
- Place a rolled towel or pillow under your knees.
- Gently hinge forward from the hips, reaching toward your feet.
- Hold for 30 seconds, breathing slowly.
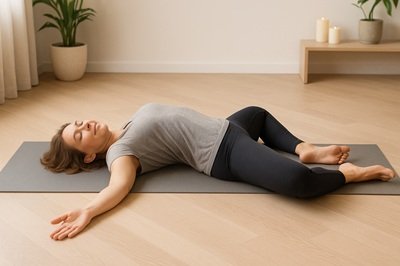
🔹 Pose 6: Legs-Up-the-Wall (Viparita Karani)
Target Areas: Hips, lower back, knees
Why it helps: Reduces swelling in the lower body, eases pressure from the spine, and calms the nervous system.
How to do it:
- Lie on your back with your hips near a wall.
- Swing your legs up the wall and rest with arms by your side.
- Stay for 3–5 minutes.
🔹 Pose 7: Low Lunge with Support
Target Areas: Hips, knees, thighs
Why it helps: Opens tight hip flexors and strengthens stabilizer muscles that support your joints.
How to do it:
- From a tabletop position, bring your right foot forward into a low lunge.
- Place cushions under your back knee if needed.
- Keep chest lifted and breathe.
- Hold 30 seconds per side.
🔹 Pose 8: Chair Pose (Supported)
Target Areas: Knees, thighs, ankles
Why it helps: Builds strength in the lower body without impact. Helps reduce knee strain by supporting proper alignment.
How to do it:
- Stand with feet hip-width apart.
- Bend your knees slightly like sitting in a chair.
- Keep your back straight and arms lifted or on hips.
- Hold for 15–30 seconds. Use a wall if needed.
🔹 Pose 9: Seated Neck and Shoulder Rolls
Target Areas: Neck, shoulders, upper back
Why it helps: Relieves tension caused by stress or poor posture, especially for desk workers or long drives.
How to do it:
- Sit upright with feet on the floor.
- Inhale, roll shoulders up and back. Exhale, relax.
- Gently roll your neck side to side.
- Repeat for 1–2 minutes.
🧘 Build Your 10-Minute Joint Relief Routine
| Time | Pose |
|---|---|
| 1 min | Child’s Pose |
| 2 min | Cat-Cow |
| 1 min | Supported Bridge |
| 1 min | Reclined Twist (each side) |
| 2 min | Legs Up the Wall |
| 1 min | Seated Shoulder Rolls |
| 2 min | Deep breathing |
🌿 Natural Ways to Boost Joint Health (Beyond Yoga)
- Eat anti-inflammatory foods: berries, leafy greens, turmeric
- Stay hydrated to cushion joints
- Use collagen or turmeric supplements for cartilage support
- Keep moving daily to improve synovial fluid
- Limit sugar and processed food to reduce inflammation
🎁Free Guide + Supplement Suggestion
💡 Want More Natural Relief for Stiff Joints?
We’ve created a FREE guide you’ll love:
“6 Natural Ways to Ease Joint Pain and Stay Active After 40 (Doctors Don’t Tell You)”Inside, you’ll discover:
✔ The top 3 foods that reduce joint inflammation
✔ Gentle movements you can do at home
✔ A clean supplement that supports flexibility and comfort👉 Click here to download the FREE guide
Many readers have also found relief using this natural, plant-based joint support:
👉 See it here
🧠 Final Thoughts: It Doesn’t Have to Hurt Anymore
You don’t need to “just live with” joint pain.
With a few minutes a day of gentle movement, you can reduce stiffness, improve your flexibility, and feel more in control of your body — without pushing too hard or risking injury.
Start with one or two poses today and build from there.
Your joints — and your future self — will thank you.
👤 Author Bio:
Written by Jennifer Collins
Jennifer is a digital wellness writer focused on natural healing, joint health, and aging well. With 3+ years of research and writing experience, she shares evidence-backed ways to feel stronger, lighter, and more mobile after 40.
⚖️ Health Disclaimer:
This article is intended for informational purposes only and is not a substitute for professional medical advice. Always consult your healthcare provider before beginning any exercise program, supplement, or treatment. Some links may be affiliate links, which help support our content at no extra cost to you.